Monday, July 29, 2013

Moist Chocolate Banana Bread/Cake


Heya!

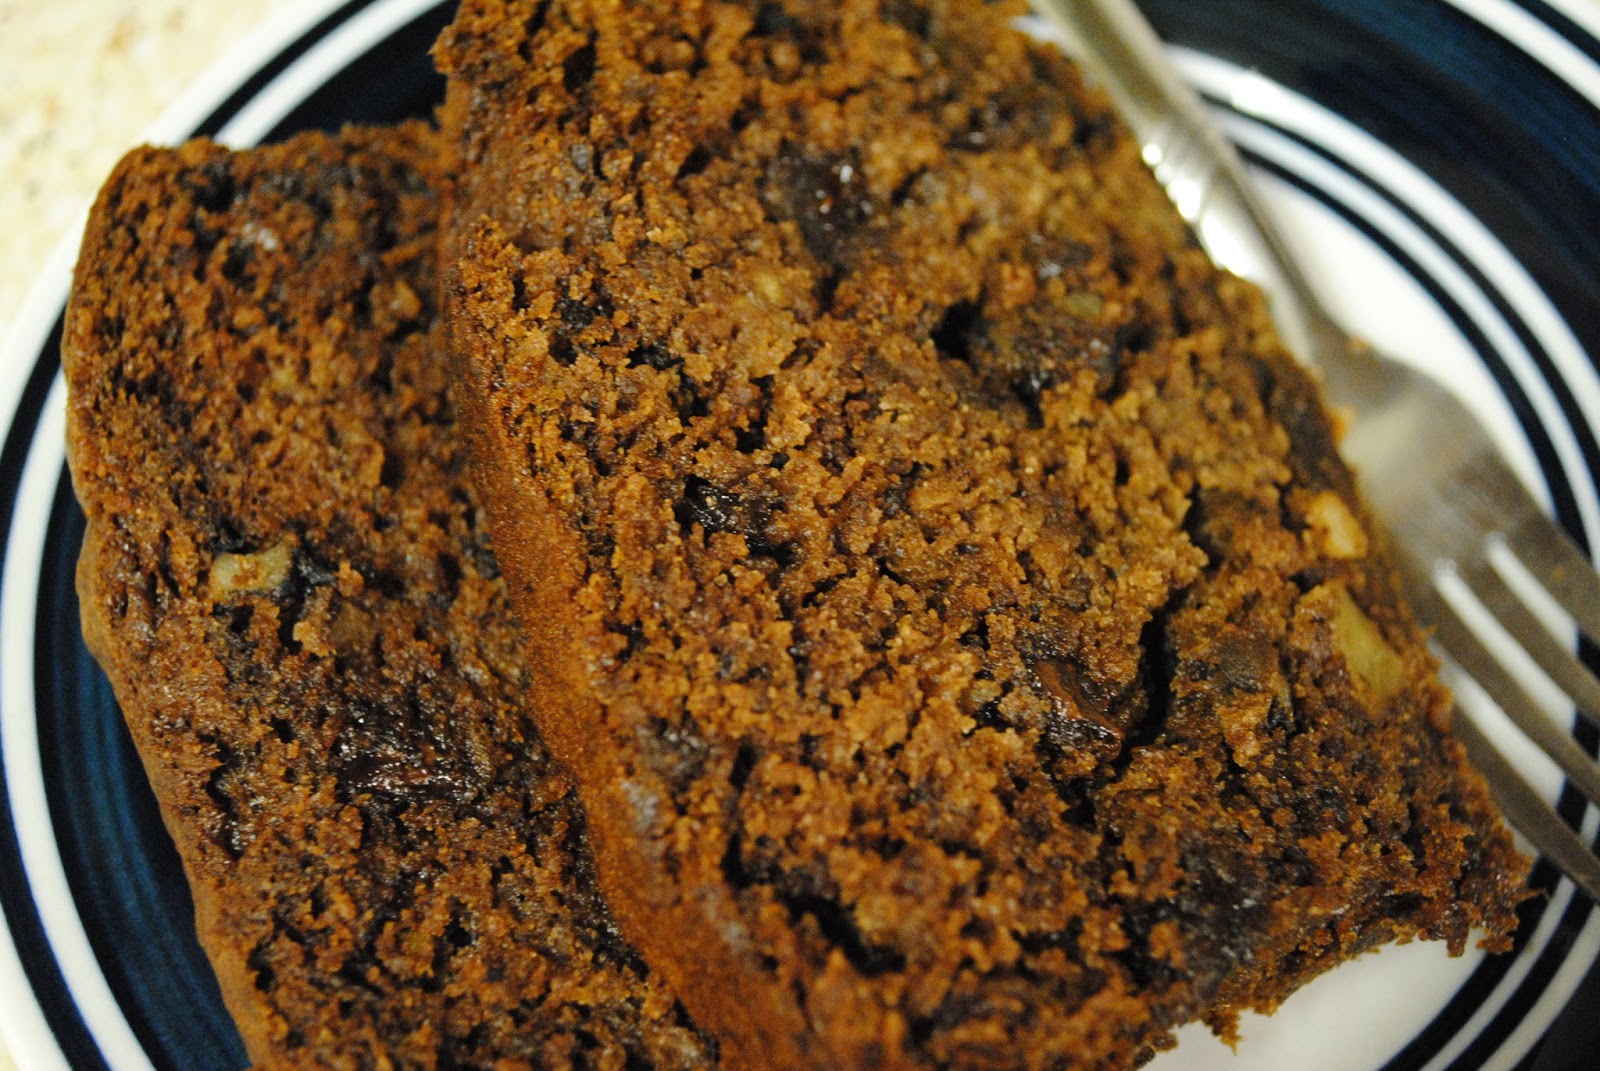
I have had this recipe done and pictures taken for over a month now. But because I got the attack of the lazies, I never got down to sharing it. This was made during one of my so called "tea parties" - a few of my friends, we get together and meet for tea once every week. We take turns hosting the tea. And so it happened that I made this chocolate banana bread the last time I hosted it. I am happy to say that it was well liked by them. It is a very easy recipe to put together and makes for a great tea snack. It can also be had as a breakfast item coz it tastes great with butter! It is a really moist type of bread because of adding the bananas as well as sour cream!  If you have a couple of very ripe bananas that you would end up throwing, then dont! Make this or check out my other banana bread and banana muffins recipes, that can help in this scenario. 


Ingredients
6 tbsp butter, softened to room temperature
3/4 cup sugar
1 large egg
3 very ripe bananas
2/3 cup sour cream
1.5 tsp. vanilla
1 1/2 cup flour
3 Tbsp. cocoa powder
1 1/2 tsp. baking soda
1 cup milk chocolate chips and chopped walnuts (optional)
3 tbsp milk

Steps

Preheat the oven to 350 degrees.

Place the butter in a large mixing bowl. Beat with an electric mixer/whisk/spoon until fluffy. Add the sugar, and beat well. Add the egg, and beat that in.

Now add the bananas, sour cream, vanilla and the milk and mix well.

Add the flour, cocoa powder and baking soda, and stir them in. You can use an electric mixer if you like -- just make sure not to overmix, or the banana bread will get tough.

Stir in the chocolate chips. and walnuts. (You could leave out either one or both, it does not affect the recipe)

Pour the batter into a greased loaf pan. Bake for 50-60 minutes until a knife inserted in the center comes out clean.

Cool the bread for atleast 20 minutes before you slice (or else it may break). Preferably have it warm and enjoy the feeling of a good comfort food!


Monday, July 15, 2013

Homemade Garlic Naan


Naan is a type of bread, which is very popular in India and other Asian countries. It is had along with spicy, thick gravies like paneer butter masala, ginger chicken, koftha curry etc. The dough is typically prepared using all purpose flour (maida) and yogurt. The dough has to ferment and acquire a natural sour taste. This will transform into fluffy, delicious Naan. We can either oven-bake these or like I prefer (and will detail below) cook on stove-top saucepan as well. So, without boring you with any further with unnecessary details, let me show you my recipe for this popular bread.

Below recipe can make about 12 medium sized Naans

Ingredients

3 1/2 cups of AP flour
1 1/4 cup of yogurt
1 1/4 Tsp of Active Rise Yeast
1 tbsp garlic powder (or even freshly minced garlic if you prefer)
Some warm water (for soaking yeast as well as kneading the dough)
Salt to taste

Steps

Kneading dough:
  • Soak the yeast in about 3 tbsp of lukewarm water for around 10 to 15 minutes (Stir the yeast lightly)
  • Put the flour in a large bowl, add the salt and garlic powder and stir to mix the dry ingredients. Now make a well in the centre. Add the yeast water and yogurt directly to the centre and gently start folding in the flour using clean hands
  • As required, add lukewarm water and knead into a loose and sort of sticky dough
  • Cover the bowl with a cling wrap or a lid that fully covers. Set aside preferably for 4 hours. It can be kept out for a maximum of 6 hours. The dough will rise to double the original size.
Making the Naans:
  • Take out a chunk of dough the size of a big lemon (yes, we need to roll it out thick unlike our usual rotis)
  • Roll it into an oval shape using ur rolling pin using dry flour as needed so that the dough does not stick to the rolling pin. The naan needs to be thick hence ensure at least a quarter inch thickness
  • Use a shallow wide saucepan with a lid. Lightly butter it and place the rolled out dough. 
  • Drop very little butter on the Naan's topside as well. We can also drop some chopped coriander or poppy seeds, whatever one wishes). Now close the lid and let the Naan cook for about 2 to 3 minutes. The top of the Naan will start developing bubbles. Flip the Naan and again close lid and let cook for another 2 minutes or till you see that side is done (with intermittent brown patches, if you know what I mean all you Roti makers!)

Naan is ready, now just serve with some good North-Indian style gravy like Daal Makhani, or Paneer butter Masala or Chole or what you wish really! Make a side of chopped onions and green chillies and you have your favourite Indian restaurant on your very own dinner table ! Bon Appetit!


Tuesday, June 4, 2013

Egg Biriyani Recipe

Yet another rice recipe! Biriyani is a rice dish that is guaranteed to make a lot of people drool. It is one of the tastiest recipes ever invented if you ask me. Easy as well. Chicken, shrimp, vegetable - all these are the usual types of biriyani. Not to leave out, egg biriyani! This is one of my go-to recipes to get lunch ready on the table in less an hour. Let me share my version, adapted from the recipe of  famous Indian chef, Sanjeev Kapoor.

Total time - 1 hour
Serves 4

Ingredients

7 or 8 eggs
2 1/4 cups Basmati Rice
1 medium onion, cut into long slices
2 medium onions finely chopped
3 medium tomatoes, finely chopped
6 or 7 green chillies, chopped
1 tbsp garlic paste (preferably fresh garlic)
1 tbsp ginger paste
About 1/4 cup chopped coriander leaves
2 tbsp oil
1 tbsp ghee
Whole Spices:
1 star anise
4 or 5 cloves
6 cardamom seeds
2 or 3 bay leaves
1 stick cinnamon (alternately about 1 Tsp cinnamon)
Ground spices:
1/2 Tsp turmeric powder
1 Tsp red chilly powder
1/2 Tsp ground garam masala (optional)
1 1/2 Tsp coriander powder
Salt to taste

Steps
  • Boil the eggs till they are hard boiled. Cut each into half, length-wise and set them aside.
  • Soak the rice for 20 minutes in water and then cook till 90 % done (add some salt and about 1 Tsp ghee). Once cooked, fluff it with a fork so that the rice does not stick together. Set aside
  • In a deep pan, add some ghee and caramelize the long cut onions. Set aside on a tissue paper
  • In same pan, add the oil and heat on medium low. Saute the whole spices for about a minute
  • Add chopped onions to this and caramelize. Then add the green chillies, saute for a minute, and secondly add the ginger and garlic paste. Fry till raw smell is gone
  • Add chopped tomatoes and stir. Now add all the ground spices including salt. Cover and simmer cook till oil separates from this masala
  • Add the boiled egg pieces, stir gently just till the masala covers the pieces and cover and simmer cook for about a minute
  • Finally add the cooked rice, top it with coriander leaves and caramelized onions. Gently stir.
  • Cover pan with aluminium foil, then place its lid. This ensures that no steam will come out
  • Finally, place the pan on another flat pan (dosa pan) placed on very low heat and dum-cook the biriyani for about 20 to 30 minutes (Dum cooking can also be done your oven, just place the lightly mixed biriyani in an oven-safe dish, cover with aluminium foil and bake in a pre-heated oven (350 degree F) for about 10 minutes.

Serve this hot with some raita. There is nothing better than a spicy biriyani as a tasty lunch option.

Tuesday, May 21, 2013

Simple Brinjal/Eggplant Fry as snack or side dish!


This post is about a very easy and quick snack which is eggplant (or brinjal) fry. This recipe has it all. Really really easy to prepare, a handful of ingredients and the tastiest result! What more could we ask? It can even be had as a side dish with rice and daal/rajma.chole. It adds just the right amount of spicy-ness. Here is the recipe -

Recipe customized from VahReVah.com

Ingredients

1 large Eggplant/Brinjal
For dry marinade:
1 1/2 Tsp Turmeric powder
2 Tsp Red Chilly Powder
Salt to taste
3 Tsp Rice Flour

Steps
  • Prepare a dry marinade by mixing all ingredients mentioned under 'For dry marinade' above. No need to add any water or oil
  • Cut the eggplant into thin round slices
  • Spread the dry marinade onto a plate with your hands. Now coat each eggplant slice on both sides with this. Since the eggplant has its own natural moisture, this will help the dry marinade to stick on both sides. Keep placing coated eggplant slices in a separate plate (to be fried at once)
  • In a wide low saucepan, pour about 2 tbsp oil, spread evenly and place as many eggplant slices as will fit. Fry each side for about 3 minutes or till done
  • Remove onto a wide plate with tissue paper. This helps remove excess oil
Thats it! So simple and quick. Plus eggplants are so easy to cut into slices. It is not required to peel them, but if you would rather peel them, then do go ahead. It tastes good any which way!

Thursday, May 9, 2013

Vellarikka Vanpayaru Erissery Recipe


Vanpayaru erissery is my Mom's specialty. I guess, for me, nobody does it better. I remember getting excited and drooling on the days my mother was preparing this in kitchen. This curry has that quintessential Malayali taste, of coconut. And this is one taste I and my husband just love! This curry is perfect for a regular lunch meal or even a Sadhya (Kerala feast).
My mother almost always made this with Mathanga (or pumpkin). But, I tried this with Vellarikka (cucumber) and it came out just as good. Folks who want the sweet taste of pumpkin can just replace the cucumber in this recipe with pumpkin.
We usually eat this with cabbage thoran or kaya-chena mezhukkuperutti and rice. It always reminds me of home!

Here is the recipe-

Ingredients
1 whole Vellarikka (cucumber), cubed
1 cup Vanpayaru (red cow peas)
1/2 an onion, roughly chopped
3 long green chillies
1 cup grated coconut
1/2 Tsp Cumin seeds
1 Tsp Mustard seeds
3 or 4 dry red chillies
Curry leaves to season
1 Tsp turmeric powder (manjal podi)
1 Tsp red chilly powder (mulagu podi)
1/2 Tsp pepper
1/2 Tsp coriander powder (malli podi)
 Salt to taste
About 1 Tbsp oil

Steps
  • Pressure cook the Vanpayaru (red cow peas) with turmeric powder, red chilly powder and 3 times water for about 10 whistles (One way to reduce the cooking time and water is to pre-soak the peas with salt for about 5 - 6 hours)
  • Now, open the cooker, add the Vellarikka (cucumber pieces) and some salt and pressure cook again for about 4 whistles. Once done, open cooker. If the peas and cucumber look very well cooked, this step is done
  • Next, grind together 1/2 cup grated coconut, green chillies, cumin seeds and chopped onion till we get a fine paste. The consistency is that of the coconut chutney made for dosa (not runny)
  • Add this paste into the cooker with the cooked payaru (peas) and cucumber and let the curry so far slowly come to boil
  • In a separate saucepan, spurt mustard seeds in the oil, roast the dry red chillies, lower the flame and add the remaining 1/2 cup grated coconut, pepper and coriander powder. Let the mixture roast on low flame till the coconut changes to brown colour
  • Then, add this mixture into the boiling curry, lower flame, let simmer cook for about 1 minute
  • Remove from heat and add curry leaves to season
Erissery is ready. Now all you need is some hot rice and pappad. Go a step ahead and have this with a Kerala dry side dish. It should pretty much be your best lunch ever!


Thursday, April 25, 2013

Long Cucumber/Kakkarikka Pachadi


This one I learnt from my mother-in-law. Some days when she makes Sambar and Mezhukkuperatti (Kerala dry side dish usually made with Ghee), she also makes this simple pachadi.
Pachadi is an authentic Kerala side dish with a gravy made of coconut and yogurt. We can put the vegetable of our choice, and in this one we only put cucumber. We can literally prepare this in 20 minutes. So if you're planning on bringing up a Kerala feast and want a curry to go well with Sambar, believe you me, this is the one. It has a very fresh, crunchy taste.

Here goes-
Serves 4 - 5

Ingredients

1/2 of a long cucumber
2/3 cup grated coconut
2/3 cup of yogurt
3 green chillies
1 Tsp cumin seeds
1/2 Tsp pepper
3 dry red chillies
1 Tsp Mustard seeds
1 Tbsp oil
Some curry leaves
Some Salt to taste

Steps
  • Cut the cucumber into small pieces
  • In a blender, add grated coconut, yogurt, green chillies, cumin seeds, pepper and salt. Blend into a fine paste
  •  Add the above paste to the cucumber and mix well
  • In a saucepan, roast the the mustard seeds and dry red chillies in oil. Add the curry leaves. 
  • Add the cucumber-coconut-yogurt gravy to this and heat on low flame for about 5-8 minutes
Cucumber Pachadi is ready. See, how easy and quickly this can be made. Those days of the week when I prepare sambar and some Thoran/Mezhukkuperutti, if I have cucumber in the fridge I make this curry. The taste of yogurt and the crunch of fresh cucumber is a perfect counter-balance for Sambar-rice. Top this with Pappadams and you're good to go!


Saturday, April 20, 2013

Tangy Tomato Rice - Ready in half an Hour!


When I hear about tomato rice, I remember my school days. One of my Tamilian friends used to bring this frequently for lunch and we all used to lunge at it! Poor girl! But that is the thing with such types of rice preparations, be it tomato rice, lemon rice or spinach pulao. They are spicy and so fun to eat. They are also pretty filling I would say. No side dish needed for these if you ask me. Just get your plate-full and attack! Oh, and did I mention these are super easy to cook? Yep, it just takes 30 minutes to get this on your dining table. Lets get cracking!

Recipe customized from VahreVah.com

Ingredients

2 cups White Rice (such as Basmati/Sona Masoori)
2 large Tomatoes, chopped
Half an Onion, chopped
3 Green Chillies, chopped
1 Tsp Ginger Paste (or finely chopped ginger)
1 Tsp Cumin Seeds
1 Tsp Mustard Seeds
About 2 tbsps Chana Daal (optional)
About 2 tbsps chopped Cashew nuts
1 Tsp Urad daal (optional)
2-3 red chillies
1/2 Tsp Red Chilly Powder
1/2 Tsp Garam Masala
Salt to taste
Asafoetida (or Heeng) to taste
Curry Leaves and Coriander Leaves for seasoning

Steps
  • Cook the rice (Microwave method - Add 4 cups of water and microwave for approximately 15 minutes)
  • In a wide enough saucepan, heat oil and spurt mustard seeds then cumin seeds
  • Add the red chillies, chana daal and urad daal. Saute till they slightly change colour
  • Reduce heat to low and add the cashewnuts and roast till they are light brown
  • Add the curry leaves, ginger paste, green chillies and onions and saute till onions are slightly cooked (not completely, as tomato rice needs to have a bit crunchy onion slices)
  • Now, add the chopped tomatoes, sprinkle salt and asafoetida, stir well and close the lid. Let cook for about 5 minutes
  • Open lid and add the chilly powder and garam masala. Again close lid and cook till the tomatoes are mushy and start leaving water.
  • If tomato masala is cooked well, we can add the rice. Mix the rice in well
  • Finally, season the top with coriander leaves and stir lightly
These steps took just 30 minutes for me overall. Supper was ready in a jiffy with no toiling in the kitchen at all. Perfect for those days when you know you are not upto being a "chef" in your kitchen but you (or your husband!) is craving something spicy!!

Sunday, March 31, 2013

Kerala Kadala Curry


Kerala kadala curry is black chickpeas cooked in authentic Kerala style. Its no surprise that Malayalees love coconuts. We come from the land of coconuts! That is why we like some curries with the taste of coconut mixed with pepper and coriander powder. Hence this way of cooking chickpeas involves a coconut milk based gravy, spiced up with pepper and coriander powder.
I made this for a breakfast get-together with our friends here with Vellayappams. The North Indians among them liked it as well!


Here goes -

Ingredients

Pressure cooking chickpeas:
2 cups kadala (black chickpeas)
2 Tsp Turmeric powder
2 Tsp Red chilly powder
Gravy:
Coconut Milk - 1/2 cup
1 large onion, finely chopped
1 large tomato, chopped
5 green chillies, chopped
1 Tsp ginger paste
1 Tsp garlic paste
1 Tsp Turmeric powder
1 Tsp Red chilly powder
1 Tbsp coriander powder
2 Tsp ground pepper
Salt to taste
1/2 Tsp cinnamon
some curry leaves
3 Tbsp oil
Coconut paste:
3/4 cup scraped coconut
1 small onion, chopped
4 cloves
2 cardomom pods
1 Tsp ground pepper
1 Tsp coriander powder

  • Soak kadala (black chickpeas) overnight in some salted water
  • Pressure cook kadala with enough water and spices under 'Pressure cooking chickpeas', till about 7 whistles. Set aside.
  • Heat a tablespoon of oil in a saucepan and roast cloves, cardomom and chopped onion mentioned under 'Coconut paste'
  • After color of onions changes, add coconut. Once coconut is roasted to a light brown, add spices mentioned here, roast for some more minutes and set aside to cool.
  • In same saucepan, heat 2 tablespoons of oil and spurt mustard seeds. Add chopped onions. When it starts to change colour, add ginger-garlic paste and chopped green chillies
  • When the above is cooked, add chopped tomatoes. Then add the spices mentioned under 'gravy'
  • When tomatoes are tender, add the cooked chickpeas along with the water. Let this come to boil on low heat
  • Mean while, grind the roasted coconut mixture to a fine paste adding very minimum water
  • Add this paste and the coconut milk to the kadala gravy and let this boil for about 2 minutes
  • Season with curry leaves
Kerala kadala curry is ready! This delicious and spicy gravy is best had with appams, puttu or noolappam. Yummy!


Thursday, March 21, 2013

Very Quick and Easy Chole Recipe


This is my quickest chole recipe yet. I use just one vessel which is my pressure cooker for the whole cooking process. And it all comes together in around 30 minutes! It is slightly like the Punjabi way of making chole or rajma, where all the indgredients are put into the pressure cooker with the ghee and just simply cooked for some number of whistles. I make a slight variation as in frying the veggies slightly in the pressure cooker itself and then adding the soaked chana and pressure cooking everything together (If you are not comfortable about using just your pressure cooker for the tadka part, you could do it in a sauce pan, taking care not to fry as much as we usually do. Then simply add the half-done tadka along with the chana in pressure cooker before cooking. 
I find this way of making very easy, quick and double as flavor-full because of cooking everything together in a closed way (pressure cooking). I urge you to try this quick method!


Total Cooking Time: 30 minutes (does not include time for soaking chana)

Ingredients

2 cups of white chana/white chickpeas
1 large onion (or 2 medium)
1 large tomato (or 2 medium)
1 Tbsp of ginger paste
1 Tbsp of garlic paste
4 or 5 green chillies
1 Tsp cumin seeds2 Tbsp of oil
1 Tbsp of curd
Some coriander leaves for seasoning
Ground spices:
1 Tsp of turmeric powder
1 Tsp of Red chilly powder
2 Tsp of Garam masala
1 Tsp of coriander powder  
Salt to taste 

Steps
  • Soak the chana in some salted warm water for at least 6 hours
  • Finely chop onions, tomatoes and green chillies
  • In your pressure cooker itself, add the oil and saute cumin seeds. Then add the onions and once they caramelize slightly (not much, since we are going to pressure cook everything with the Chana anyway), add the ginger-garlic paste and green chillies
  • Once the raw smell is gone from the above, add the tomatoes and all the ground spices and saute till the tomatoes are slightly tender
  • Add the soaked chana (straining out the water used for soaking first), then add sufficient water so that it comes to about 2 inches above the level of the chana. 
  • Add 1 Tsp of ghee. Stir this in well. Close the cooker with weight. Pressure cook on medium high till about 6 - 7 whistles
  • After opening, add about 1 Tbsp of curd and the coriander leaves, stir and let boil for about 2 minutes
 The chole are now ready to serve! Serve this hot with some rotis, pooris or even rice and sabzi. Its superbly homely and a real comfort food!


Wednesday, March 13, 2013

Banana Crumb Muffins for Breakfast!

 
Muffins, muffins and more muffins! This is my latest mantra. I just love muffins and quick breads. They just make your breakfast meal that much more special. Muffins especially. Fluffy and moist, these go perfectly well with your morning coffee or milk. They just make you feel so good all morning! Here is my banana muffin recipe.

This recipe cistomized from www.tasteandflavours.com

Ingredients 

2 cups of All Purpose flour
1 cup of packed light brown sugar
1/2 cup of vegetable oil
1 large egg
1 Tsp baking powder
1 Tsp baking soda
1/2 Tsp salt
6 Tbsp sour cream
2 Tsp vanilla extract
4 medium/3 large ripe bananas mashed

Crumb topping (optional):
1/3 cup packed brown sugar
2 Tbsp AP flour
1/8 Tsp cinnamon
1 Tbsp cold butter (I used a butter substitute)


Steps
  • Pre-heat oven to 350 F (176 C) and line a 12-cup muffin tray with paper liner/or grease each cup.
  •  Whisk together the flour, baking powder and soda, and the salt and set that aside
  • Secondly, to the mashed bananas just add the 1 cup of brown sugar, vegetable oil and the egg and whisk until well combined
  • Add the vanilla and sour cream and give the wet batter a good whisk till well combined
  • Add the dry ingredients to the wet and fold the dry stuff into batter. TRY NOT TO OVER_MIX the batter. Just use a flat spoon/spatula/ladle and simply ensure there are no obvious dry flour. The batter should be a bit lumpy and thick.
  • Fill each cup of muffin tray with the batter until 3/4th way full.
  • Crumb topping (optional) - Mix the brown sugar, flour and cinnamon (mentioned under crumb topping). Now add the cold butter and mix into this (either with hands or fork) until a coarse texture is obtained. Sprinkle evenly on the batter in each muffin cup.
  • Bake this for about 25 mintues. Toothpick inserted must come out clean  
Note - I was able to make about 16 muffins with these measurements.So if you have a 12-cup muffin tray, while the 12 muffins are baking, you could set aside the remaining batter, covered. Just bake them after these 12 are done. Trust me they will turn out fine as well!
 
An awesome way to start your day. A muffin and a glass of fruit shake. Wow!
Give my blueberry muffins a peek as well!!


Spicy Shrimp Biriyani, Our Sunday lunch!


I learnt the art of making basic biriyani from my good friend here, Veena. She is my Guru and a brilliant Biriyani maker! I made my first chicken biriyani here in the USA and gave her Gurudakshina, which was a plate-full of that same biriyani!
Building on that basic knowledge I gained from here, I tried the Prawns/Shrimp Biryani. Since both I and my husband are prawn lovers, I just had to try this one out. Try, I did. And now this is a regular one on a lot of weekends. So here's my take on the authentic prawns biriyani. It is a simple recipe.

Serves 4
Cooking Time: About 2 hours
 
Ingredients

1/2 pound (a little more than quarter kg) of medium sized prawns (tail-off, peeled, deveined and washed)
2 1/2 cups of Basmati Rice 
2 medium onions
2 medium tomatoes
1 Tbsp gingerpaste (either home-made or store-bought)
1 Tbsp garlic paste (either home-made or store-bought)
5 medium sized green chillies
1 Tbsp of raisins
1 Tbsp of cashewnuts 
2 Tbsp of oil
2 Tsp ghee

Main biriyani masala:
1 Tsp Turmeric Powder
1 Tsp Red Chilli Powder
1 Tbsp Garam Masala
1 Tsp Cinnamon
Salt to taste
 
For Marinade:
1 Tbsp gingerpaste (either home-made or store-bought)
1 Tbsp garlic paste (either home-made or store-bought)
1 Tsp Turmeric Powder
1 Tsp Red Chilli Powder
3 Tbsp of Curd
Salt to taste

Extra spices:
7 - 10 cloves
1 Tsp whole cardomom seeds
Some Bay leaves
Some Cilantro leaves for seasoning


Steps 
  • Wash and soak rice in water for about 30 minutes
  • Mix ingredients mentioned under 'Marinade'. Cover the prawns with this. Let sit for about 20 - 30 minutes.
  • Cut one half of an onion into long thin slices. Cut the rest of onions, tomatoes and green chillies into fine pieces
  • Grind the cardomom seeds and cloves together to form a fine powder
  • Cook rice with two times its measure of water, some salt, half of the fine powder prepared in previous step and bay leaves until 90% done. Set aside.
  • Meanwhile, heat about 2 tbsps of oil in a saucepan, and caramelize the long slices of onions until a deep brown. Set aside. In same oil, roast the raisins and cashewnuts. Set aside
  • In the same oil, caramelize the finely cut onions (add more oil if required). Add green chillies, ginger and garlic paste and fry till raw smell goes
  • Add the tomatoes and all spices listed under 'main biriyani masala'. Mix well and let cook till mushy.
  • Now, add the marinated prawns along with marinade to this, cover and cook for about 5 - 8 minutes, taking care not to overcook the prawns
  • Time for final 'dum' cooking - In a large baking pan (akin to a 9 X 13), add 2 teaspoons of ghee. Spread it around. Add a layer of prawns masala, then a layer of the rice, some of the fried onions, raisins and cashew, layer of prawns masala and finally the last layer of rice and remaining onions, cashew and raisins. Top with cilantro leaves
  • Seal tightly with oven-safe aluminium foil. Bake at 350 F (176 C) for about 30 minutes
  • Ready to serve

 
This biriyani tastes awesome with some vegetable raitha and dates chutney. Perfect for a Sunday lunch!  

Monday, March 11, 2013

Peach and Pineapple Cobbler

Well, in school, the only cobbler I knew was the guy who fixed our broken sandals. But here in the USA, this is also the word for a very delicious dessert, made with a layer of syrupy fruits with a cakey topping. Talk about poles apart!!

I have an earlier blog for a similar dessert - apple crisp. But the difference is that, a 'crisp' as I understand is almost always made with an oats topping, giving it a crunchy crust. Whereas a cobbler has a more cakey topping, made basically using all purpose flour and milk. Since I am so big into fruits, I have decided this dessert is going into my frequent recipes book (a purely hypothetical book that I have never written and never intend to!!)

Here, I have tried the authentic peach cobbler, as is usually made by Americans, but I also added pineapples! And the result was truly delicious, complete with the gooey-ness and good-ness of both the fruits! 

 
Here goes -
 
Ingredients

Fruit Filling

2 1/2 cups of cut and diced pineapple
2 1/2 cups of cut and diced peaches
1/4 Tsp cinnamon
2 Tsp lemon juice
1/3 cup white sugar
1/4 cup brown sugar

Crust part

1/2 cup of butter
1 1/2 cup of AP flour
2 1/2 Tsp baking powder
3/4 Tsp salt
1 cup of white sugar
1 1/2 cup of milk

Steps
  • Pre-heat oven to 350 F. Melt the butter in a 13 X 9 pan and set aside to cool.
  • Add all the ingredients listed under 'Fruit Filling' in a saucepan and stir well. Heat the fruit mixture on medium flame till juices come out and start boiling. Set aside
  • In a separate large bowl, mix the ingredients listed under 'Crust Part' except butter (the butter must remain in the baking dish after melting). First mix the flour, baking powder and salt. Then mix in the butter and milk. Stir the batter well, but do not over-whisk/mix
  • Finally, pour the wet batter into the baking dish containing melted butter. DO NOT STIR (the butter will move to the side which is how it should be). Plop chunks of the fruit mixture over the wet batter, spreading all around. Again, do not mix.
  • Bake for about 45 - 50 minutes, until the top is golden brown.
  • Let it cool down a bit. But serve when warm. With vanilla ice-cream! Or leave the ice-cream out. Its good any which way!
Do give this one a try. It is very very easy but very very tasty!